When dealing with sensitive personal data in your Tableau dashboards, you must have security measures in place. If you’re new to Tableau and don’t know where to start when it comes to data security, you’re in the right place.
One of the most common options for data protection in Tableau is row-level security. Row-level security limits the amount of data that a user has access to. For example, if you are a healthcare organization and have a patient portal, patients should only see their own data – not another patient’s.
In this article, we will show you how to execute row-level security in Tableau desktop.
Row-Level Security with User Filters
Row-level security is often used synonymously with user filters. User filters are just one way to achieve row-level security in Tableau. Let’s look at an example.
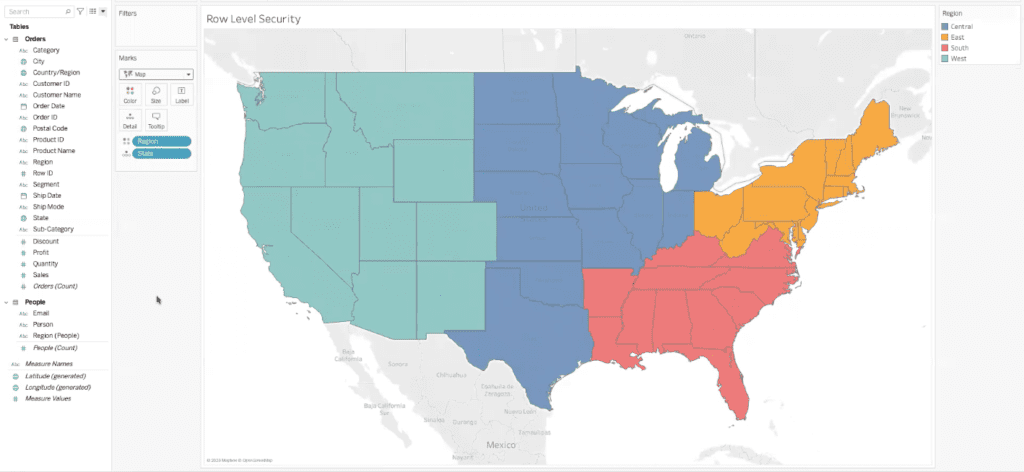
Here we have created a United States map that highlights four regions: Central, East, South, and West. Now we want to add user filters to our map. To do so, head to “Server” in the top toolbar of your desktop.

In the drop-down menu that appears, select “Create User Filter”.
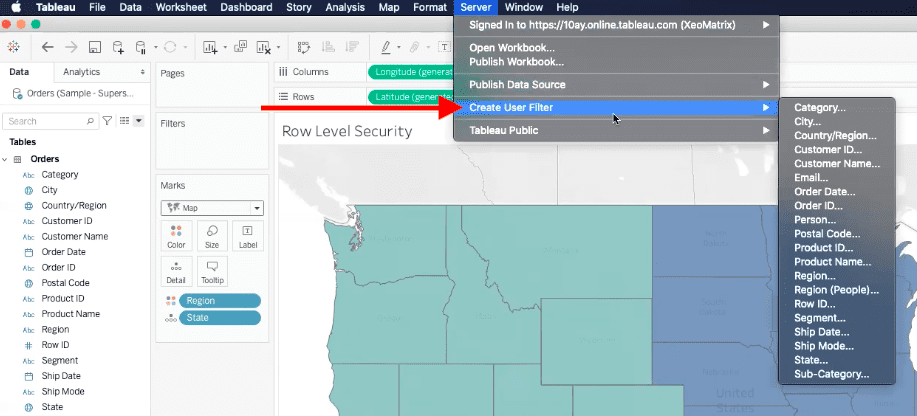
A sub-menu of user filter fields will appear. Choose the field that you want to assign your row-level security at. For our example, we will select “Region” because we want to assign security at the regional level.
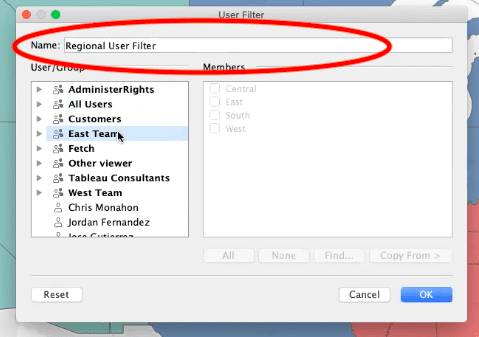
Once you have selected your user field, a menu will pop up in your dashboard.
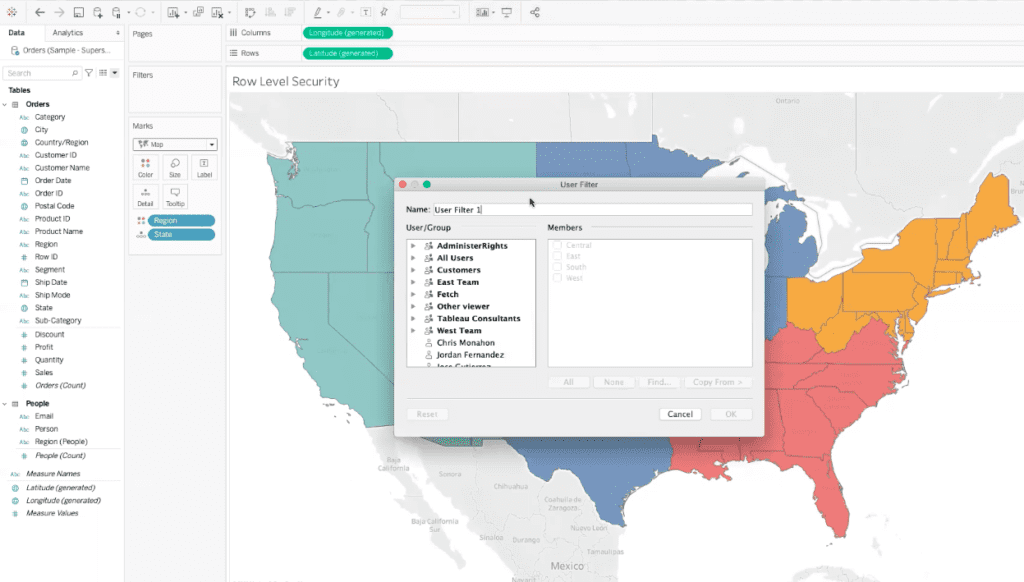
In this menu, you can rename your user filter. We have renamed ours “Regional User Filter”.
We can also use this menu to select individuals or groups and assign permissions to them manually. In our example, we will select individuals and assign permissions that limit our map regions they can see.
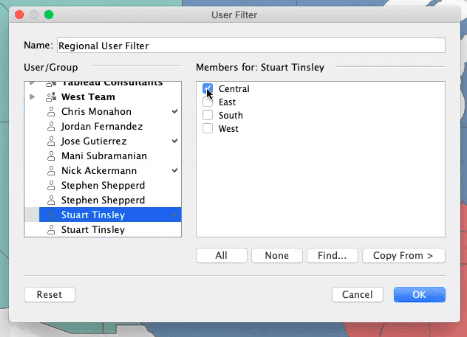
We chose to assign the “Central” Regional User Filter to an individual, Stuart. Now, whenever Stuart logs in to his Tableau dashboard, he will only see data for the Eastern region of our map.
You can also assign all of the user filters to an individual.
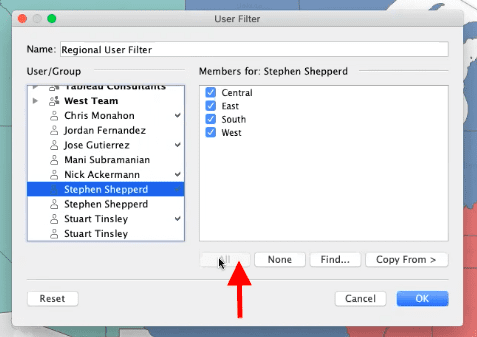
This may be necessary for administrators or executives who need the full data picture.
After you have finished selecting the users or groups that you want to assign row-level security to, select “OK” in the bottom right of the pop-up menu.

Now Tableau has created a Regional User Filter set for us. This new set will appear as a data field in the toolbar on the left of the Tableau dashboard.
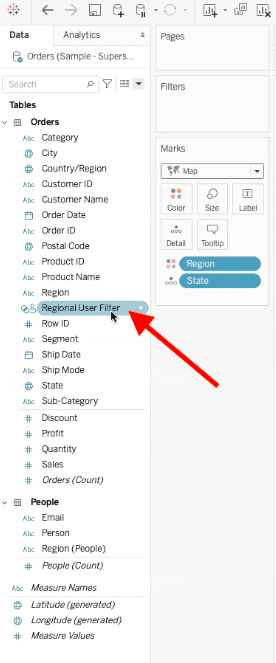
Now we are going to drag the Regional User Filter data field up to the “Filters” box next to the tool bar.

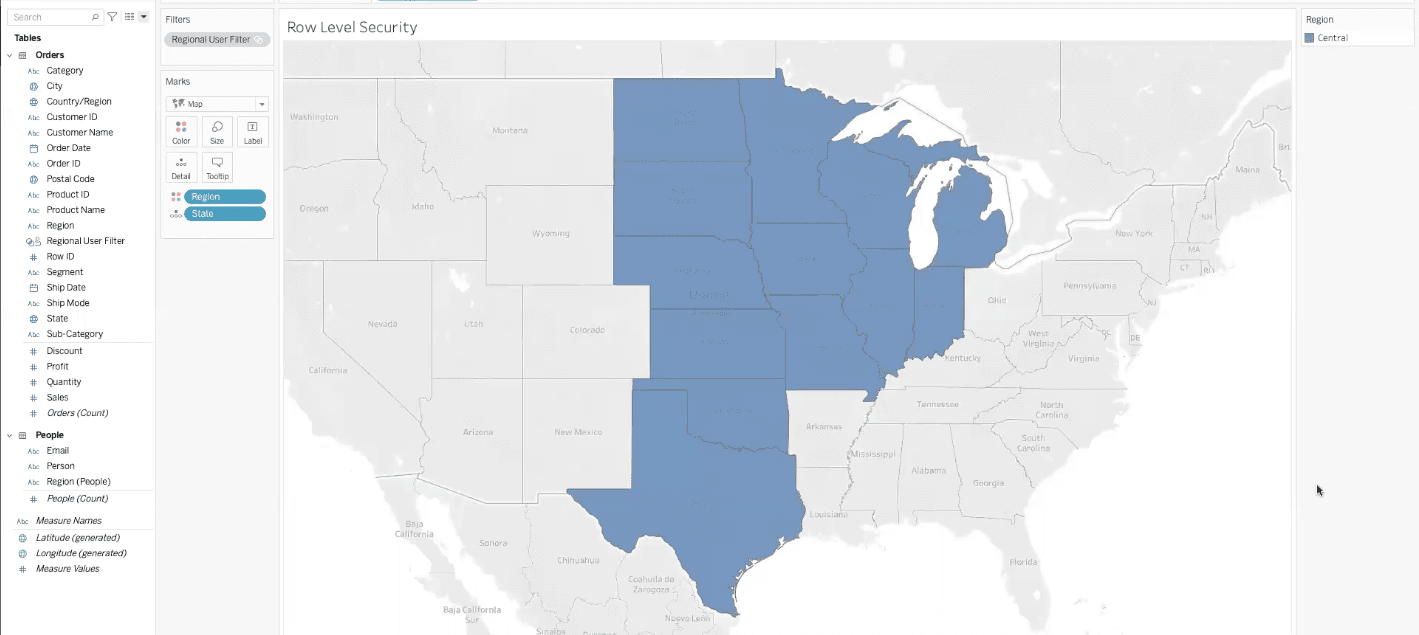
Once we have placed the Regional User Filter field in the filters box, we will be able to see what each user’s dashboard will look like with their specific permissions. In our example, we are seeing what Stuart’s dashboard will look like when he logs in to Tableau.

Now, instead of a U.S. map with all four regions highlighted, only the Central region is highlighted.
Cons of User Filters
User Filters are useful for beginner row-level security in Tableau, but they have their downfalls.
First, you have to manually select and assign permissions to groups and individuals. If you are a smaller organization with only 5 to 10 users, then User Filters might be a good way to go. But for larger organizations with multiple groups and hundreds or thousands of individual users, it’s best to find another row-level security solution.
Another problem with User Filters is that different Tableau users will have different access. A regular Tableau viewer who signs in to their dashboard will only see the end-result portal. They cannot web edit their dashboard. On the other hand, a Tableau Explorer will have access to web edit their dashboard, including their preset filters. They can remove the User Filter that they were originally assigned and see any data that they want. So, if you only have Tableau viewers, User Filters may work for you. But if you have more experienced Tableau Explorers, you should find another option for row-level security in Tableau.
Row-Level Security with User Login
Another way to implement row-level security is by leveraging the information that Tableau has about the user logging in. Let’s look at an example.
Head to the “Data Source” tab on the bottom left of your Tableau dashboard.
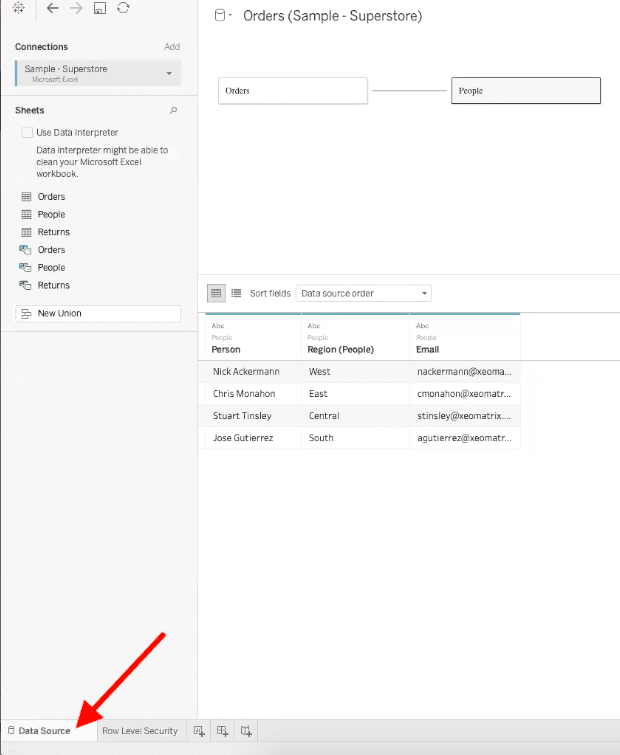
In this tab, we have a small table with three attributes: Person, Region, and Email. We can use this information to make our row-level security more dynamic.
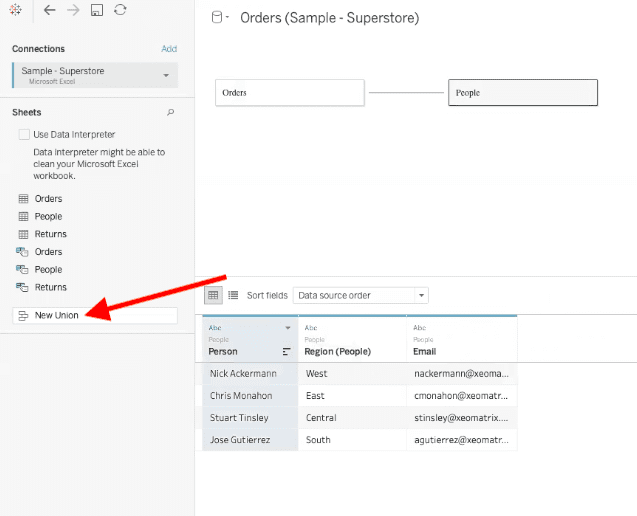
First, you need to join this data with another source. In this case, we are joining together “Orders” and “People.” To join data, select “New Union” on the left of the Data Source tab. Then, select which two sources you want to connect.
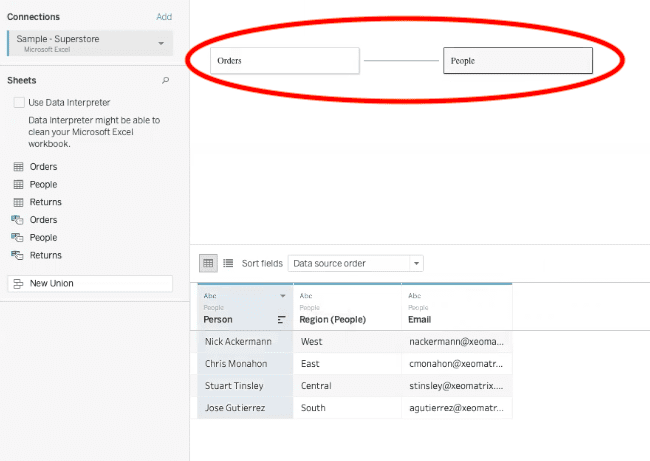
The connection will then appear in the Data Source tab.
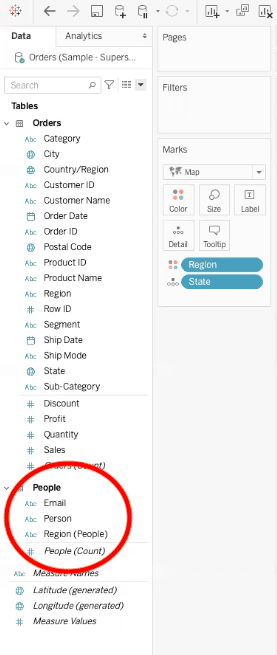
Now, switch back to your dashboard editing tab. Make sure that you see your data source in the tool bar on the left.
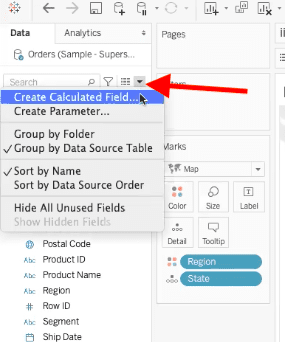
Next, open the drop-down menu to the right of the search bar in the Tableau dashboard. Then select “Create Calculated Field.”
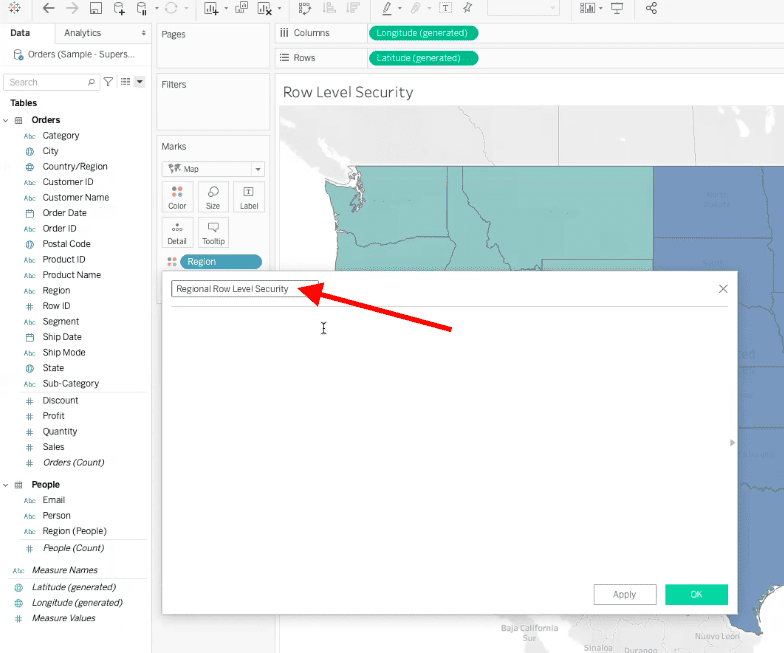
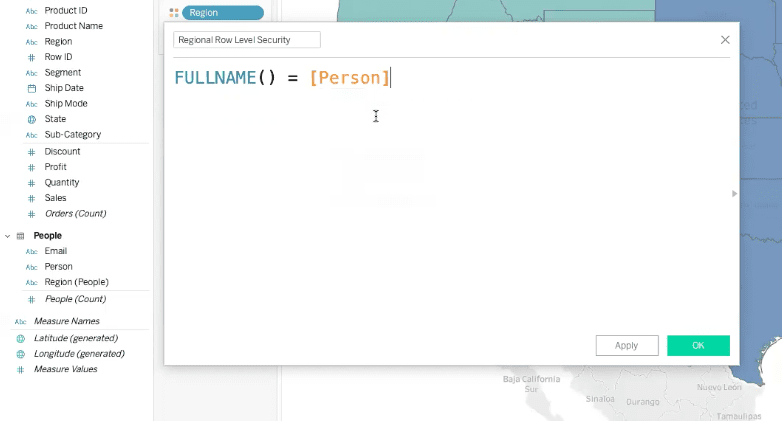
A pop-up should then appear. In this pop-up, we renamed our Calculated Field “Regional Row Level Security.”
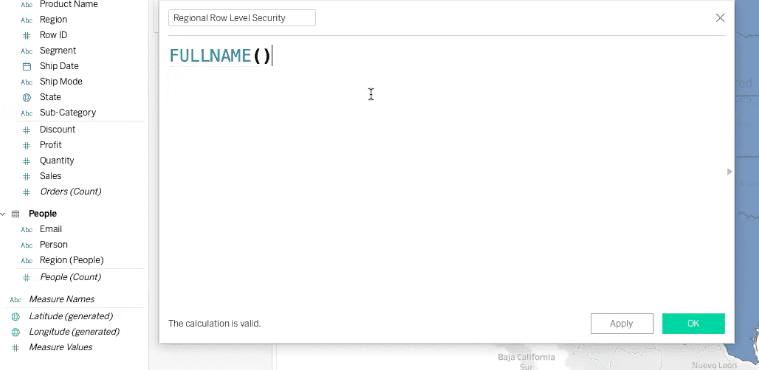
Now we are going to use this pop-up to call upon a function in Tableau that references the user logging in. In our example, we are going to use the full name function. To use this function, tupe “full name” in the empty space in the pop-up, and a drop-down with the proper function will appear.

Select the full name function. The function will then appear in the pop-up.
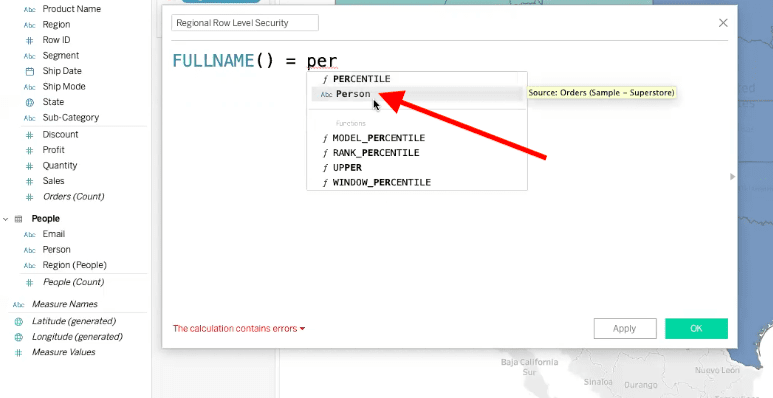
This function tells Tableau to reference a user’s full name to assign them certain permissions when they login to their dashboard. In our case, we want the full name function to pull from the Person field from our original data source. To do so, we will add an equal (=) sign after the parentheses of the full name function and then type “person”. The person function should appear in a drop-down menu, so we will select that.
Now our pop-up has the full name function, and we know that it is referencing the Person field from our data source.
Click “OK” in the bottom right corner of the pop-up.

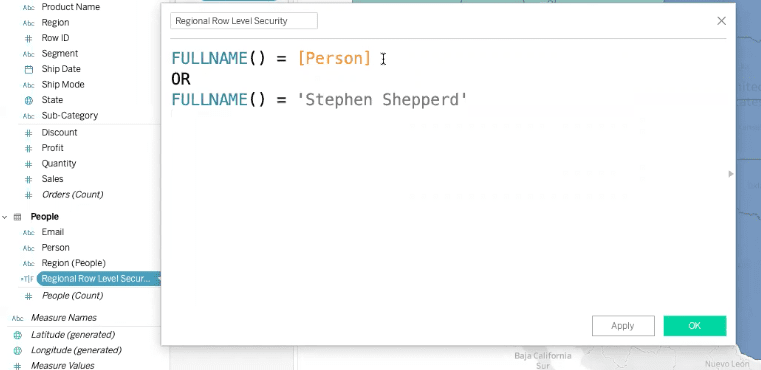
If you have an administrator or developer who is not included in your People data source but needs to access all data, you can add them to the function by name.
In our example, we are adding our administrator, Stephen. To do so, we will type “Or” under the full name function. Then we will repeat the full name function process, but we will type Stephen’s name after the equal (=) sign instead of using the Person field.
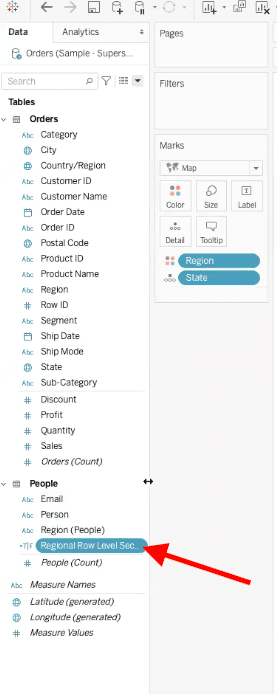
Now a Regional Row Level Security field has been added under the People dataset in the left hand tool bar.
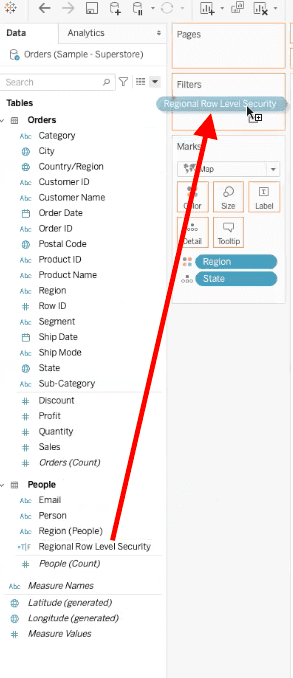
Next, drag the Regional Row Level Security field up to the Filters box in your Tableau dashboard.
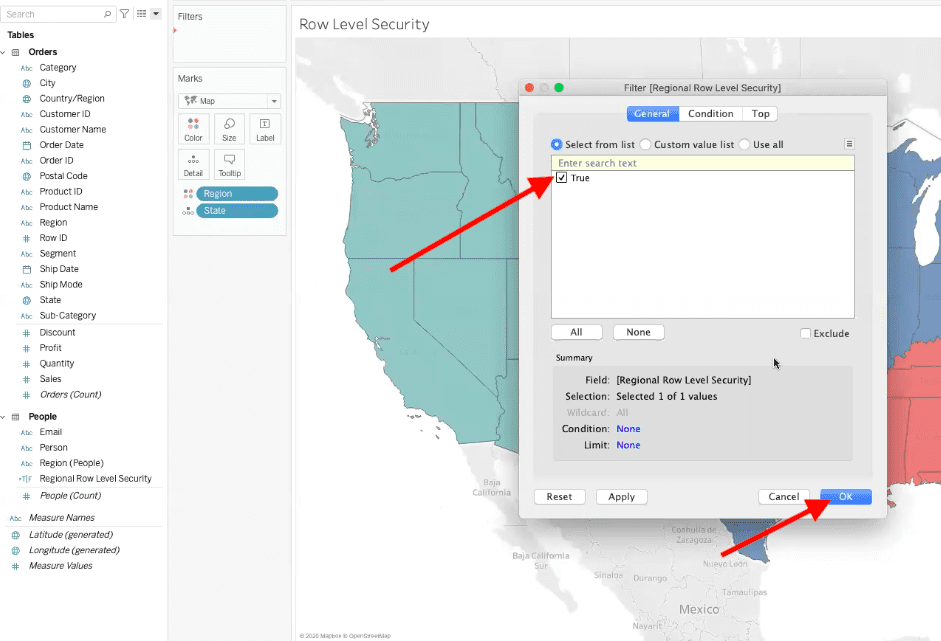
Once you have dragged the data field into the Filters box, a pop-up menu will appear in the dashboard. The pop-up should have the word “True” with a checkbox next to it. If the pop-up says “False,” you will need to review your data source and functions to make sure they are referencing the right field.
Check the box next to the word “True,” and then select “OK” in the bottom right corner of the pop-up.
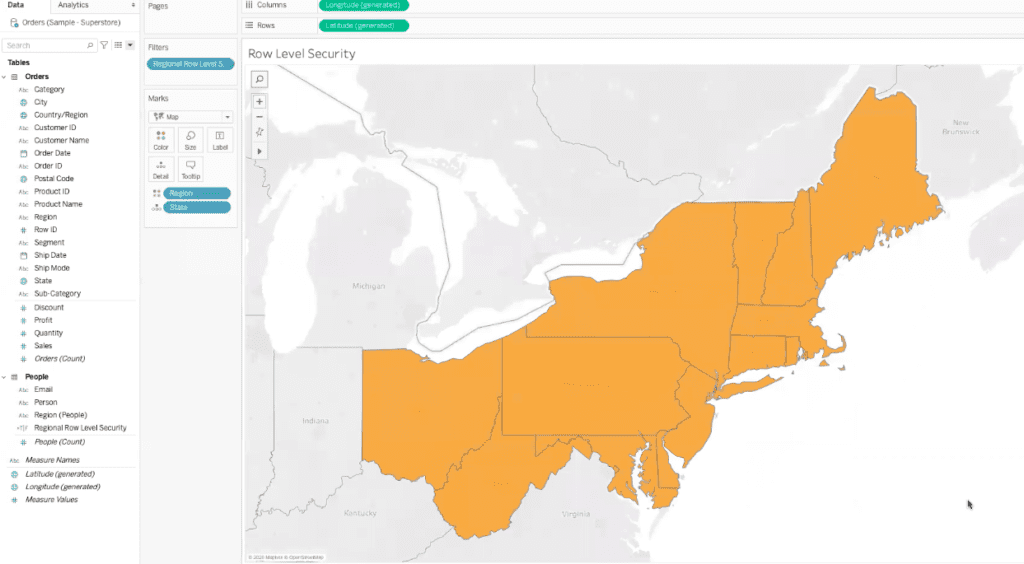
When users log in, they will only see the data that has been assigned to them. In our example, a user named Chris has been assigned the East region. When he logs in to his Tableau dashboard, he should only see that region highlighted on the map, like in the photo below.
Now, instead of selecting each user and assigning their permissions, you have a table that will continue to work as your company grows and adds new people.
This takes away a lot of work for administrators and developers who create these tables, but it still leaves Tableau Explorers with the ability to web edit their dashboards.
Security for Tableau Explorers
So, we’ve learned about row-level security and how to make the process simpler for administrators, but how do we prevent Tableau Explorers from removing these security measures?
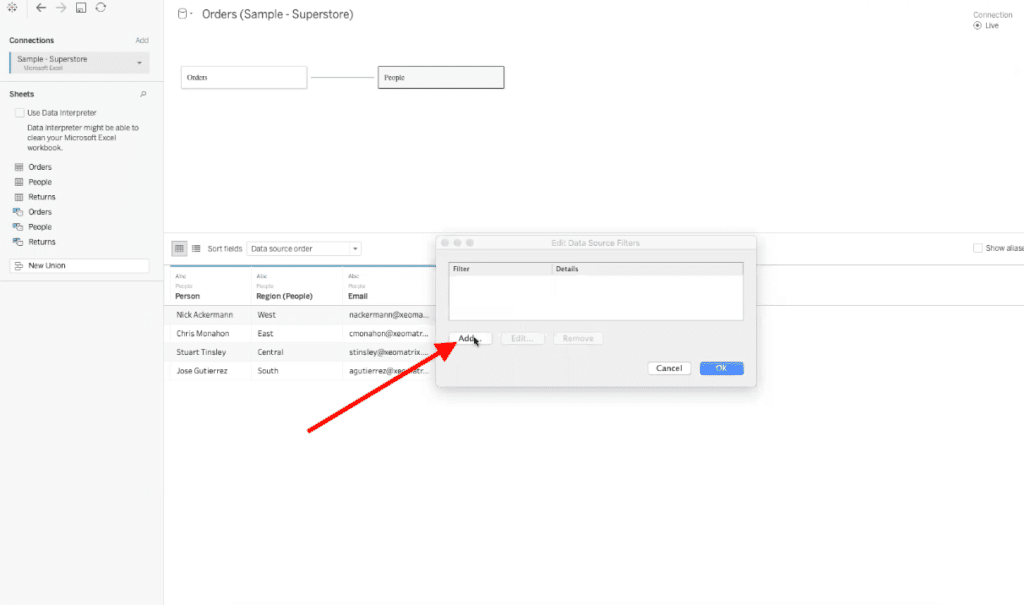
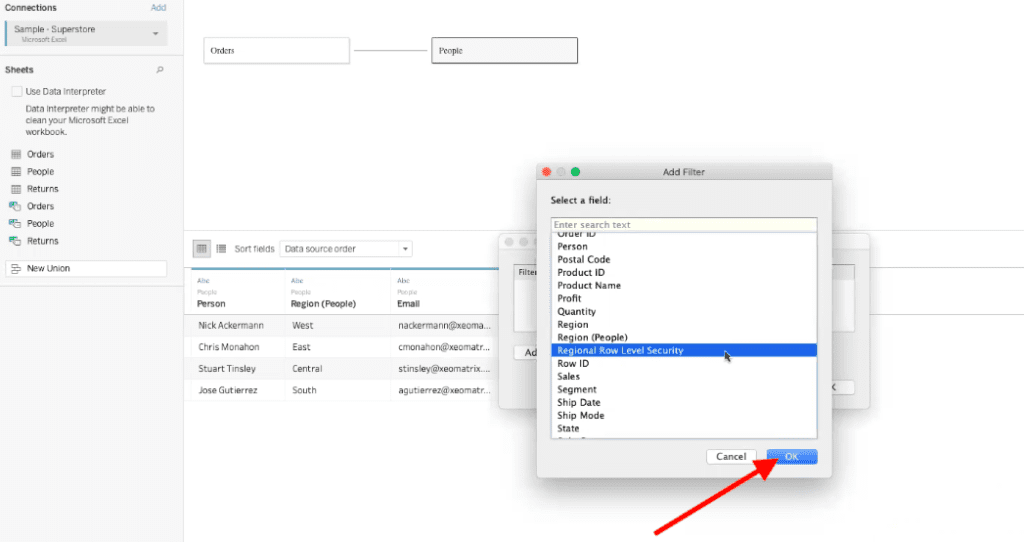
First, head to your Data Source tab. In the top right corner under “Connection,” there is an option to add a data source filter. Select the “Add Filters” option, and a pop-up will appear. In this box, select the “Add” button.
Now another pop-up with a list of filter options will appear. In our example, we have chosen the Regional Row Level Security filter from the list.
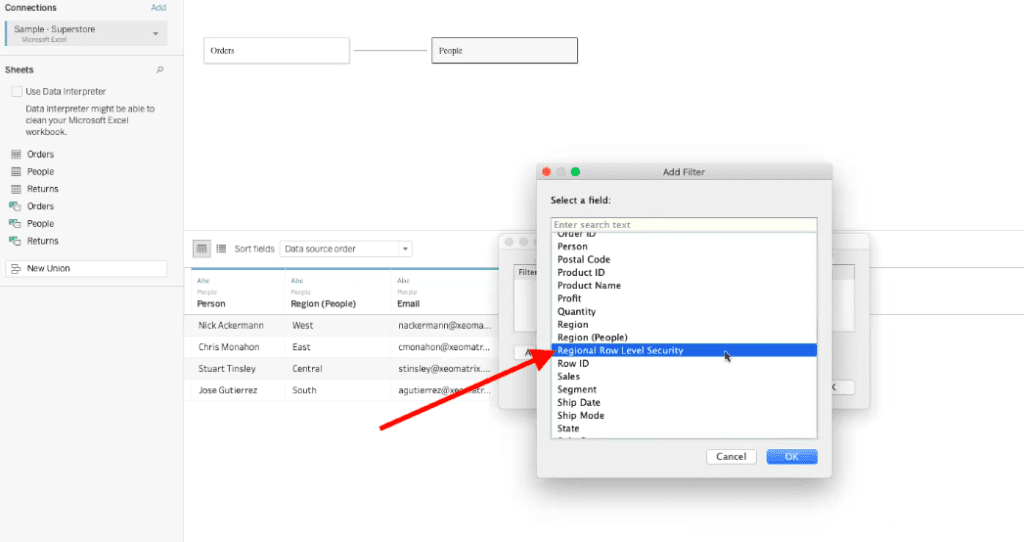
Once you have chosen your filter, select “OK” in the bottom right corner.
Then, another pop-up will appear. In this pop-up, check the box next to the word “True,” and then select “OK” in the bottom right corner.

The final step is to publish the dashboard to the web with these row-level security measures implemented. Now, all users will be limited to the permissions assigned to them via row-level security.
Keep Your Data Secure
Securing your data can feel overwhelming, especially if you’re new to data analytics and reporting. If you’re still unsure where to start with row-level security in Tableau, contact us at XeoMatrix. Whether you need assistance securing your data or want more in-depth training on implementing row-level security yourself, we have a solution available for you.